During a three-month period in the winter of 2013/14, claims made to NHBC increased by over 40% compared with normal levels for the same period in previous years. Around half of the claims reported during this period were in relation to external wall issues, with an increase of over 150% above ‘normal’ levels experienced. NHBC received around 1,200 claims related to inadequate cavity trays and DPCs in the three-month period. This compares with 1,700 in total over the previous three full years.
Analysis of the findings of investigations into these defects has revealed very few, if any, cases of construction that had been built in accordance with NHBC Standards having failed; in most cases, the cause was found to be directly related to workmanship. This indicates that the Standards, including classification of exposure areas, are suitable for purpose, but that ensuring construction is in accordance with the Standards is the major issue.
Cavity Trays & Damp Proof Courses
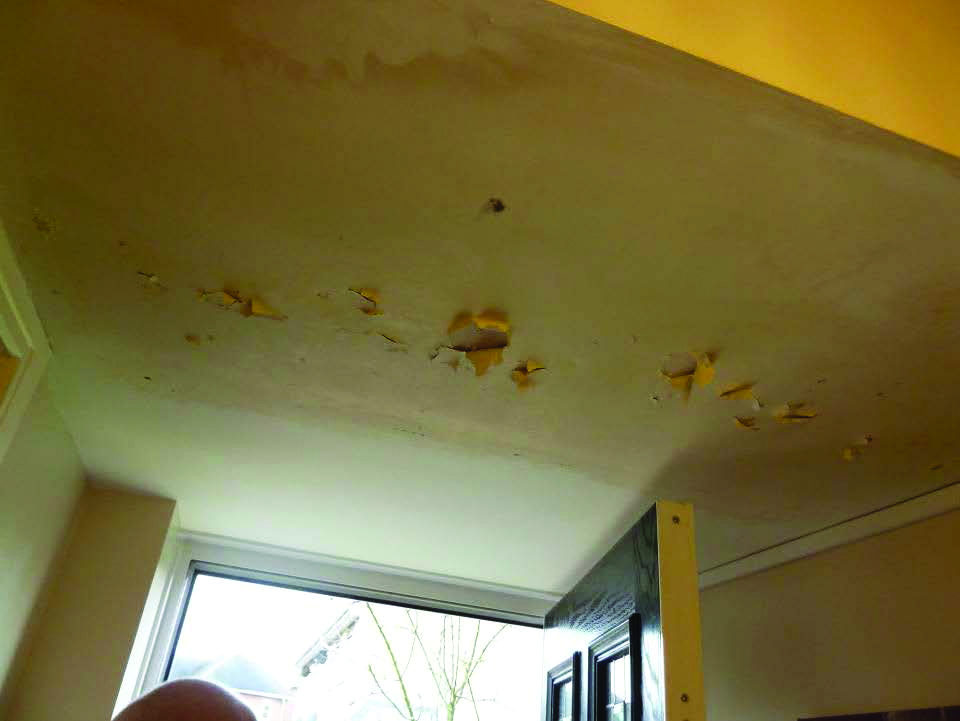
The issues surrounding cavity trays include: trays being installed at the incorrect height, not linking with flashings, or being omitted completely.
Further analysis in relation to external walls and NHBC’s on-going campaign to raise the standard of pitched roofs also shows a significant increase in flashing and upstand failures at abutments. This highlights that a clear understanding between trades as to who will do what is necessary to ensure correct installation and satisfactory construction quality.
Horizontal cavity trays
NHBC sees simple workmanship issues with horizontal trays – from the flexible material being too narrow, weep holes being omitted or trays being bedded down onto brickwork, making cutting out for flashings necessary and damage inevitable. We also see issues with horizontal trays above meter boxes and flues or ducting, including examples where flues and ducts have been installed through the tray.
The following highlight good practice when installing cavity trays above openings and at abutments:
- Weep holes should be provided and spaced at a maximum of 450mm intervals; each opening should have at least two weep holes
- Cavity trays or combined lintels should have stop ends. Where cavity trays are used, they should extend at least 25mm beyond the outer face of the cavity closer and cover the ends of the lintel
- At abutments, the cavity tray should be linked to a flashing to prevent water penetrating into the enclosed area
- Mortar should be raked out whilst still green to allow the flashing to be tucked under the cavity tray by a minimum of 25mm
Stepped cavity tray
To install a stepped cavity tray correctly, careful consideration should be given to the setting out. For this to be successful, trade collaboration is paramount. It is good practice to use a template, e.g. an appropriate roof truss or frame (with guide lines), to assist with setting out the stepped trays.
As a rule of thumb, the back of the tray should be 170-200mm above this truss (NHBC Standards require stepped flashings to have a minimum upstand of 85mm above the top of the finished roof line). Utilising an appropriate truss or frame, as per the example, should enable bricklayers to install stepped trays in the correct position and alignment.
Focus on cavity trays and DPCs
Ensuring that the trays are in the correct position and aligned is only half the battle. There are a number of other requirements that must also be adhered to:
- To comply with the guidance within NHBC Standards, stepped cavity trays should be preformed. If any other method is used, this will need to be agreed with your Inspector together with the method by which you will ensure correct installation
- The lowest tray should project beyond the eaves line of the roof; there should be a starter tray (stop end at both ends) and a weep hole should be included
- Each intermediate tray should overlap the previous with the stop end closest to the roof line
- A ridge tray, with open ends, should be provided at the ridge
- Mortar should be raked out whilst still green to allow the flashing to be tucked under the cavity tray by a minimum of 25mm
- Tile selection will dictate if a secret gutter, proprietary soakers or soakers, or a cover flashing is required at the abutment
Summary
Experience during the storms of 2013/14 has reinforced previous analysis regarding the number of claims related to superstructure; with some 33% of all section 3 claims (years 3-10 of the Buildmark Policy) dealt with by NHBC in 2013 being in relation to external walls.
We have focused on cavity tray and DPC issues as the dominate cause; however, our review has highlighted further areas requiring attention, including render, mortar and parapets and copings, which must all be carefully considered.
For further technical advice and support, call 01908 747384 or visit www.nhbc.co.uk